There have been plenty of occasions when my classroom has resembled a zoo!
But today, through Augmented Reality, we actually turned our EYFS classroom into a real zoo!
I've blogged about different ways you can use Augmented Reality (you can read them here) and it never ceases to amaze pupils and bring that moment of awe and wonder that technology can provide.
The app we used today was LEO AR camera. Using Apple's ARkit, the app allows you to scan the ground and place 3D animated objects into the real world.
There are a range of different objects you can add including different animals and dinosaurs. There is a horror option which may not be appropriate for your pupils. Today, we just used this app on my teacher device.
There is a record option which allows you to video the animated object within the scene alongside your pupils. This is a little buggy at the minute so today we just used the screen record option of the iPad to capture the interaction between the pupils and animals.
Once we had placed some animals in the classroom, we recorded each other standing with them. Using the app Apple Clips, the pupils then shared some facts about each animal. We put everything into a little video as a guide to our classroom zoo. Let us know what you think:
Before I start discussing what we did, it is only right to share where the original idea for this project came from. This blog post by the brilliant @Joe_Moretti gave me the inspiration for this project - AR STORYCUBES PROJECT
I have been using my iPad with my children to support them with their reading journal homework for a while now. My boys struggle with their handwriting and find it very onerous to write even though they have some great ideas.
As discussed by @MrTullock at the Animate2Educate conference last week, technology should be used to enable children to show their knowledge and understanding even if they struggle with an element such as decoding or handwriting or spelling. I loved a quote he shared, and I have linked it in a poster to the story @CarolJAllen shared around the latest BGT winner.
I want to use technology so my children and pupils can create content to express themselves, their knowledge and their understanding.
Making our own Interactive Avengers Story Cube was the perfect example of this. My children are obsessed with Avengers at the minute, so I bought them the origin storybooks. These are great books as they tell the origin story of each superhero as a story rather than comic. If you click the picture below, you can buy the books yourself.
We generated three questions to ask each superhero:
Who is your alter ego?
How did you become a superhero?
What are your superpowers?
Using the app, ChatterKids Pix, the children recorded videos as the characters answering those questions using what they had learned about the superhero from reading the book. They linked the three videos together using the app Apple Clips, where they could add titles and music.
Their finished videos looked something like this:
They made a similar video for each superhero. Then used the app Foldify to create their own cube:
Once they finished the design and printed it out. I would recommend before cutting and sticking it together, to use app HP reveal to link the videos to each face of the cube. For a detailed guide for how to use the app HP Reveal - click here. The app uses Augmented Reality to link your video content through a trigger image. Once this has been completed they can cut out the cube, fold along the dotted lines and glue the flaps to create their own cube!
Using the app HP Reveal, they can scan each side and the app should load the digital content linked meaning you can watch and learn all about that superhero.
Once finished, my children wanted to share what they have created and more importantly share how to do it so others can make their own so created this YouTube tutorial video:
As stated in Joe's original post at the top, there are lots of different ways in which this idea can be used:
The water cycle
The life cycle of the frog
Breaking down a maths problem into six parts or six different maths videos… watch an equation come to life …
A science experiment
Bringing history to life (can you imagine six sides with a head on each side coming to life using Morpho Booth so that the heads come to life and speak!)
A Geography cube of the globe where a map comes to life with a video created in Explain Everything. ( A journey cube?)
You may remember a project I did with Year One last term:
I decided to do a similar project with Year Three for their science topic about the Human Body.
We started with the Curiscope Virtuali-tee. This amazing augmented reality t-shirt never fails to create a lesson of awe and wonder! If you've not ordered one of their t-shirts, I would highly recommend it. Buy a t-shirt here.
As a class, we explored all the different parts of the body and used the guide to learn facts about how our body works and what each organ does. The children were then given a part of the body and given some more time to find other facts about it.
Using the app Chatterkids Pix, the children had to create animated videos sharing their learning.
The students also used Greenscreen to create images giving the illusion we could see inside their body. Using Seesaw, they labelled all the different parts of the body:
To link everything together, we used the app Thinglink. This allowed all the pupils to embed their videos onto their labelled picture to create a whole class interactive guide to the body. This video explains the process:
A few years back, I put together an eBook - 15+ ideas for the emoji keyboard in class. The eBook shared some useful and inspiring ideas for how to utilise the emoji keyboard.
I have since blogged about using Bitmoji in class. This is another great tool that allows teachers to turn themselves into a cartoon and then create images such as these to share with your pupils:
I have just seen a blog from Mr Hill who shares some more ideas for Bitmoji, you can read it here.
More recently, there has been a new tool that seems to have dominated every social media platform and that is GIFs. To define a GIF:
An animated GIF is an image encoded in graphics interchange format (GIF), which contains a number of images or frames in a single file and is described by its own graphic control extension. The frames are presented in a specific order in order to convey animation. An animated GIF can loop endlessly or stop after a few sequences.
GIFs seem to be everywhere and for the past few months, I have been using GIFs in the classroom. Here I want to share a few ideas.
First, the app GIPHY is the app I use to access a library of GIFs. PLEASE BE AWARE, THIS APP IS ONLY ON MY TEACHER DEVICE. THERE ARE A LOT OF GIFS INAPPROPRIATE FOR THE CLASSROOM SO IT IS ONLY A TOOL THAT I ACCESS AND SHARE THE GIFS FROM MY DEVICE USING AIRDROP.
Within the app, once you have selected a GIF there is the option to export it and save it as a video. This can be a great way of enhancing projects in class. For example, if my class were creating some content in Adobe Spark Video, I can find a GIF, export it as a video and then share it via airdrop to their device so they can add it to their presentation.
We also did a project where we used GIFs to help with vocabulary. I had found a range of GIFs that link to different emotions. Pupils created short videos on Shadow Puppets Edu using these GIFs alongside words to describe those feelings. We then use Augmented Reality to link these videos to this sheet using HP Reveal:
If you follow the Davyhulme channel on HP reveal, you should be able to scan each emoji which will reveal the student's vocab videos.
Matching the words with the short animations give children the opportunity to consider actions which link to these emotions - Delighted = skipping gleefully. This can be a great way of developing and making links to Alan Peat's 'show not tell' techniques. Even making links to his and Mat Sullivan's exciting sentences. In particular, sentence types like Tell: Show 3; Examples.
For example:
He was delighted: skipping gleefully; twinkling his fingers; smiling broadly.
A further way to develop 'Show not tell' through GIFs, would be to use them within a sentence. For example, if I created this and share it on the board:
, he left the classroom straight away.
First, ask the children to identify the tell in this sentence. You will probably get - angry.
Therefore, we can start by rewriting the sentence as:
Angry, he left the classroom straight away.
However, this would be a tell sentence. To engage the reader in our story we want to play to the reader's intelligence. Remember one of the golden rules of storytelling from the brilliant minds at Pixar:
So, using the above GIF, you can ask your pupils, "How is Spongebob showing us he is angry?" Allow the pupils to create some action phrases:
Rocking back and forth,
Clenching his fists,
Gritting his teeth,
Snarling his face,
Encourage the pupils to then replace their tell opener with one of their show phrases and discuss why this is more effective. This can be developed with a whole range of GIFs to create that animated visual to help with action phrases to encourage that show not tell.
Another useful idea is to use an app to create your own GIF. If you are a blogging school and want to share a few images from a particular lesson or trip, you can put a number of images together and create a GIF that you can then embed in your blog or website. The apps Lively and GifToaster are worth a look for this.
I hope you find this post useful. Please do share in the comments if you use these ideas and how they work for you.
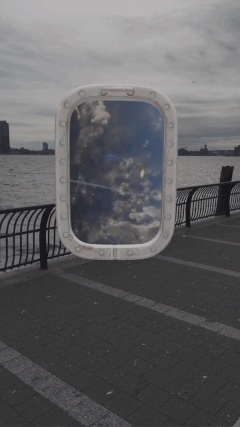
The feature in the app which I was immediately drawn to was the portals feature. This allows you to place a portal within your world. This portal allows you to travel to any 360° image. There are a couple of pictures included but you can also add your own. Straight away I knew this would be something that would inspire some amazing writing in my class and today I finally got the chance to have a go with our brilliant Year 3 pupils. But as I always discuss on my CPD and INSET the big hook was what they were going to do with their writing which was to bring it to life and create their own movie!
As their topic is linked to space, we decided to use a 360° image of space. The pupils had a go with the app and stepping through the portal and exploring outer space. The look of awe and wonder and that sound of the collective 'wow' was one of those special moments. After that, we worked on writing a story. The idea would be that the children would write in first person about finding the portal in class and stepping into it. We discussed different techniques to make our story interesting, these included:
An effective opening sentence to hook and intrigue our reader.
Describing the weather to set the mood.
Describing the silence when realising they were all alone.
Finding the portal and describing our reaction
Multisensory description after stepping in the portal.
A cliff hanger ending.
The effort from the students was brilliant and we got some really good writing from them, here are a few examples:
Once the children had finished their writing, they could transform it into their own movie. Using the app iMovie, the children narrated their writing over a video of the Figment app in action. Within iMovie, they could change the pace of the video to match their narration, add sound effects, filters and as an extension use Garageband to create a soundtrack. It was a brilliant afternoon and the pupils worked exceptionally hard knowing that their hard work would be shared with you! So please make their day by leaving them a comment!
Here are some of their examples:
Just to make you aware, Figment AR will only work on newer devices running on iOS 11.
In my sessions each week at Davyhulme, I have been working on a project with my Digital Leaders. As a school with a motto 'Reaching for the Stars,' I wanted the pupils to create a display that would inspire children to persevere and not let failure stop them achieving their goals.
The idea was inspired by something I saw at Candleby Lane School in Nottingham. They had a display featuring stories from teachers talking about how they have failed and how they overcame that failure. So we did the same, we asked teachers to share stories of times when they felt they had failed and how they worked through it and didn't let it stop them from achieving their goals. I feel this is a really powerful thing to share with our students to make them understand that everyone will have ups and downs including their teachers. Here is my example:
The Digital Leaders also researched famous people who had also struggled in their journey to reach their goal. To share what they had learned, they used the app Apple Clips to create a short video about each person, why they are famous and what failure or obstacle they faced on their journey to being a success.
To enhance the display we then linked the videos through Augmented Reality using the app HP Reveal (formerly Aurasma) to make the display interactive. This is something we have used before and you can read about our interactive reading display here.
Here is a video of some of our Digital Leaders talking about their finished display:
We have also published all of our videos about famous people who failed to this YouTube playlist, we hope you enjoy watching them:
One of the most exciting new features of Apple's iOS11 is the new ARKit and the possibilities with this new feature. The downside, as I discovered last week, the new AR apps will only work on devices with A9 or A10 chips. After installing these apps on most of our school devices, I quickly discovered they didn't work and had to change my plans quickly.
My Year 6 digital leaders did, however, get to try these apps out on my iPad. First, they started with the app AR Runner.
The app used AR to create checkpoints which you run to as a way to complete different challenges. It is a great way to combine technology with PE as the children are timed when completing the challenges. Word of warning though, make sure you have decent cases on your iPads as no doubt there will be a few accidents when your pupils are into the game.
The Year 6 pupils all had a few attempts of completing a challenge and collated their scores on a Google Sheet.
Using another Augmented Reality app - Graphmented, the children then displayed the results of their challenge by presenting the data in Augmented Reality. The children then recorded an explanation of the results and worked out the average time it took the group to complete the challenge.
Both apps have great potential to enhance learning in PE, maths and science, whether the majority of schools will be able to access these apps with the devices they have in school will be difficulty.
Year 1 are learning all about the human body. Today, we used technology to enhance this topic further. First, we used the brillaint Virtuali-tee app from Curiscope. Click here to read more about this app. To order a t-shirt, click here.
Once we had explored and discussed the different parts of our body, the children all took turns wearing a green t-shirt and used the camera to photograph each other. They pupils then used Doink Greenscreen to create a picture that looked like we could see inside their body.
Once the pupils had uploaded their pictures to Seesaw, we used the explain and reflect tool in Seesaw to label the major organs.
Finally, with the help of our Digital Leaders, some children were able to record a video explaining how some of our organs work, see the video here:
The children loved using the technology to provide the WOW through the use of Augmented Reality but then using different creative tools to share their knowledge and understanding.
I love using technology to create moments of awe and wonder with my pupils. Two of the best tools for this are Augmented Reality and Virtual Reality. Imagine an app which combines both to make learning about the Human Body more fun and interactive than ever before!
I have been following the progress of the Curiscope project for the best part of a year after backing the campaign on Kickstarter. It is fantastic to finally see the app and t-shirt available.
The app is FREE however it needs one of the t-shirts to work. The t-shirts come in a variety of colours and sizes and can be ordered here.
Once you have the t-shirt, one pupil can wear it and the others can use the app on different devices to scan the t-shirt, where they are then able to see inside the body! As you can see with the following gif created with my sons.
The app allows you to investigate different physiological systems such as the circulatory and respiratory systems. You can tap an option to have a voiceover share interesting facts and information about the body. There is also the option to view using virtual reality, meaning if you get the app on an iPhone or similar device you can use a Google cardboard or VR headset and give the children a fully immersive 3D experience.
The app is a superb example of how technology can transform the way in which we learn, in this case, about the body.


%2B(1).png)


